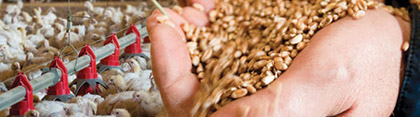
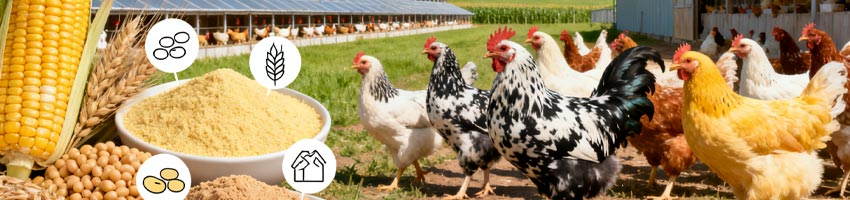
Raising chickens—whether for fresh eggs or pasture-raised meat, hinges on one critical factor: high-quality feed. Commercial feeds often come with hidden additives, inconsistent nutrient profiles, or steep price tags, leaving many poultry keepers seeking a better alternative. Making your own chicken feed isn’t just a cost-saving measure; it’s a way to tailor nutrition to your flock’s unique needs, leverage local resources, and ensure transparency in every ingredient.
Chicken Feed Production: Nutrition, Production & Tips
This comprehensive guidance covers the full spectrum of homemade chicken feed—from foundational principles to advanced tips, regional adaptations, equipment selection, and quality control—with deep dives into specialized guides to support your journey. Whether you’re a first-time hobbyist or a small-scale farmer, this guide empowers you to create feed that fuels healthier, more productive chickens.

The Foundations of Homemade Chicken Feed: Key Principles to Follow
Before diving into recipes or equipment, mastering the basics of poultry nutrition and feed safety is essential to avoid deficiencies or health risks. These core principles apply to every flock, regardless of size or location.
1. Nutritional Balance: Tailor to Life Stages
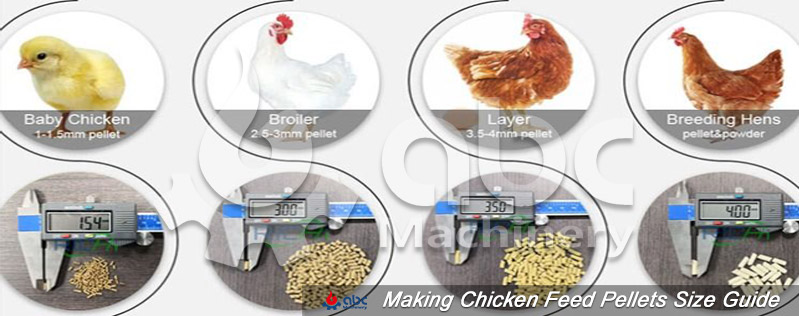
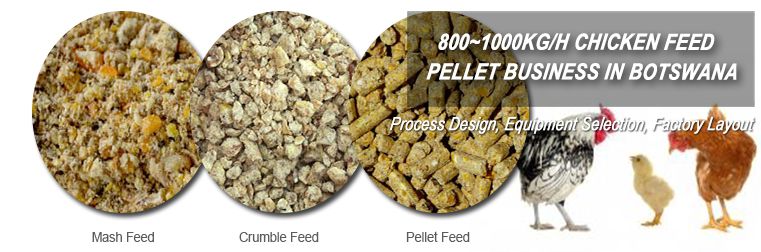
Chicken Feed Pellet Size Guide by Flock Life Stages
Chickens have distinct nutrient needs based on age, purpose, and health. The table below summarizes the critical requirements for common flock types, serving as a quick reference for recipe development:
|
Flock Type |
Protein Requirement |
Key Nutrients to Prioritize |
Recommended Core Ingredients |
Critical Notes |
|---|---|---|---|---|
|
Chicks (0–8 weeks) |
18–20% |
Protein, Vitamin A/D3, Calcium, Phosphorus |
Ground corn, soybean meal, fish meal, wheat bran, oyster shell powder, vitamin premix |
Avoid coarse grains; grind ingredients to 1–2mm for easy digestion |
|
Growers (8–18 weeks) |
16–18% |
Balanced protein, Energy, Fiber |
Maize, sorghum, sunflower seed cake, lucerne meal, salt, limestone |
Prevent overfeeding protein to avoid fatty liver development |
|
Layers (18 weeks+) |
16–18% |
Calcium (3.5–4%), Omega-3, Vitamin D3 |
Corn, soybean meal, flaxseed, oyster shells, alfalfa meal, probiotics |
Increase calcium gradually; avoid excess salt (max 0.5%) to prevent eggshell issues |
|
Broilers (Meat Birds) |
20–22% |
High Energy, Protein, Lysine |
High-protein soybean meal, corn, fish meal, wheat, vegetable oil (for energy) |
Focus on nutrient density to support rapid muscle growth; avoid fiber-heavy ingredients |
2. Safety First: Avoid Harmful Ingredients & Contamination
-
Steer clear of toxic foods: Avocado pits, chocolate, caffeine, raw beans, and moldy grains can cause illness or death.
-
Source high-quality ingredients: Choose mold-free, non-GMO grains and protein sources; store raw materials in airtight, rodent-proof containers.
-
Maintain hygiene: Clean equipment thoroughly between batches to prevent bacterial growth.
3. Cost-Efficiency: Maximize Value Without Sacrificing Quality
Homemade feed doesn’t have to be expensive—focus on:
-
Bulk purchasing: Buy grains, meal, and supplements in large quantities to reduce per-kilogram costs.
-
Local sourcing: Replace imported ingredients with regionally available crops (e.g., sorghum instead of wheat in arid areas).
-
Byproduct utilization: Repurpose food scraps (e.g., cooked rice, vegetable peels) or agricultural byproducts (e.g., sunflower seed cake) as supplementary ingredients.
How to Make Fodder for Chickens: 3 Simple Production Methods (From Home to Industrial Scale)
Whether you’re a backyard chicken keeper, a small-scale farmer, or a commercial producer, there’s a tailored solution for making high-quality chicken fodder. Below are three scalable methods—adaptable to your flock size, budget, and production goals—all focused on nutrition, efficiency, and practicality.
Method 1: Homemade Mixed Fodder (No Special Equipment – For Backyard/Small Flocks ≤50 Chickens)
Perfect for hobbyists or those new to homemade fodder, this method requires minimal tools and lets you control every ingredient. It’s cost-effective and ideal for small batches.
-
Plan the formula: Follow life-stage ratios (e.g., 18-20% protein for chicks, 16-18% for layers). Typical mix: 50% energy sources (corn/barley), 25-30% protein sources (soybean meal/fish meal), 10-15% fiber (wheat bran), 5-8% minerals (oyster shell powder/salt), and 2% vitamin premix (optional).
-
Source & prepare ingredients: Choose mold-free, non-GMO grains; crush large grains (e.g., whole corn) with a blender or mortar for better digestion (skip for adult chickens).
-
Mix thoroughly: Combine all dry ingredients in a large container or wheelbarrow. Stir vigorously for 5-10 minutes to ensure uniform distribution—clumps mean uneven nutrition.
-
Store properly: Transfer to airtight, rodent-proof bins. Keep in a cool, dry area (below 25℃) and use within 3-4 weeks to avoid nutrient loss or mold.
Pro tip: Add small amounts of fresh greens (kale, spinach) or cooked vegetable scraps for extra palatability—chickens love variety!
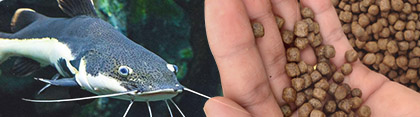
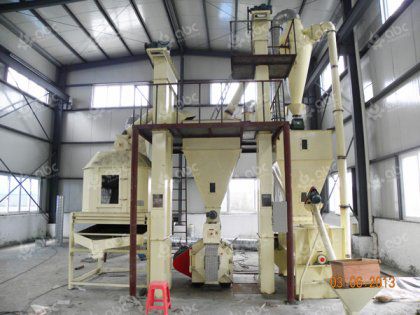
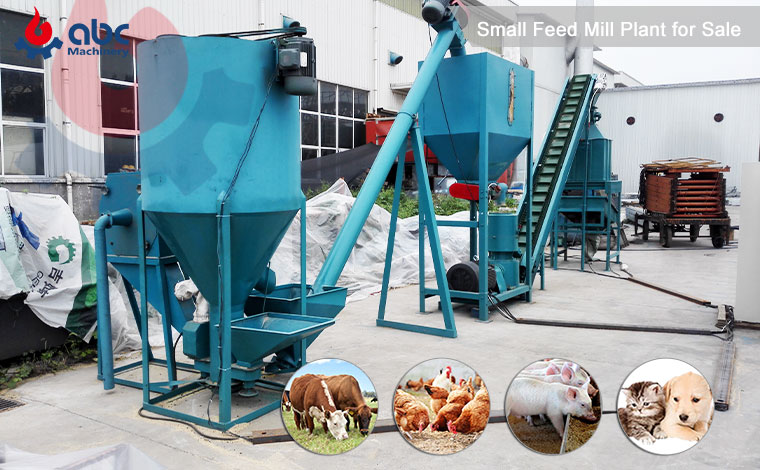
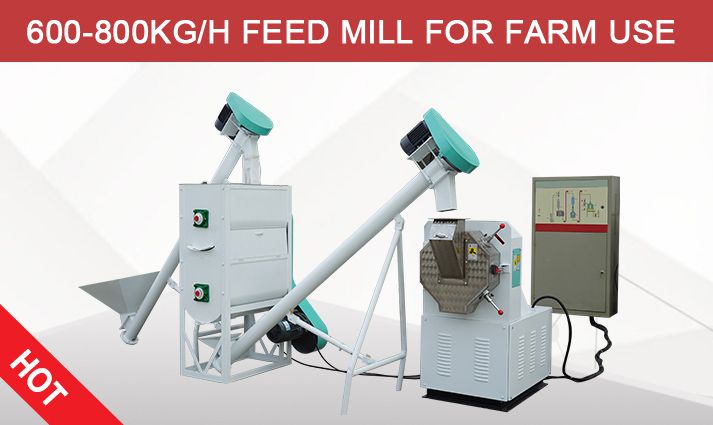
Method 2: Small-Batch Pellet Fodder (With Compact Pellet Machine – For Medium Flocks 50-500 Chickens)
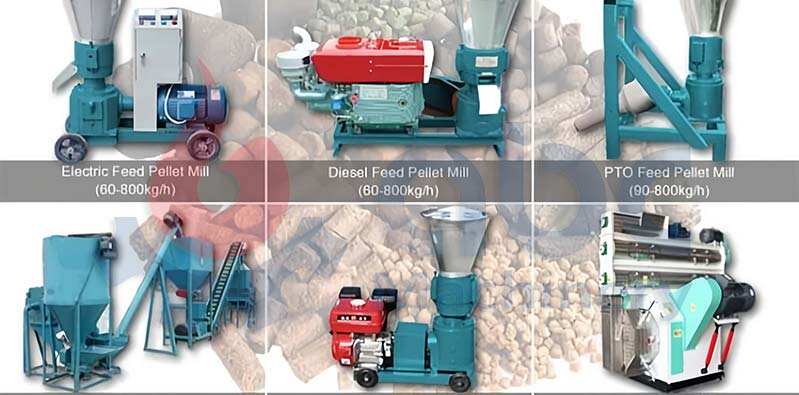
Affordable Small Home Chicken Feed Pellet Maker
Pellets reduce waste, improve feed intake, and make storage easier compared to loose mix. This method uses a small-scale pellet machine (affordable and portable) to turn your mixed fodder into durable, nutrient-dense pellets.
-
Prepare the base mix: Use the same dry ingredient ratios as Method 1. Grind all grains to 1-3mm (finer for chicks, coarser for adults) to ensure pellet binding.
-
Add moisture: Mix in 12-15% clean water (or molasses water for extra palatability) until the mixture clumps slightly when squeezed.
-
Pelletize with a small machine: Use a handheld or tabletop poultry pellet machine (flat die design works best for home use). Feed the mixture into the machine—heat and pressure from the die will form uniform pellets (3-5mm diameter is ideal for most chickens).
-
Cool & dry: Spread pellets on a baking tray or mesh rack. Let them cool to room temperature (1-2 hours) and dry slightly—this hardens the pellets and extends storage life.
-
Store: Keep in airtight containers; pellets stay fresh for 6-8 weeks. They’re also easier to transport and less likely to be sorted by picky chickens!
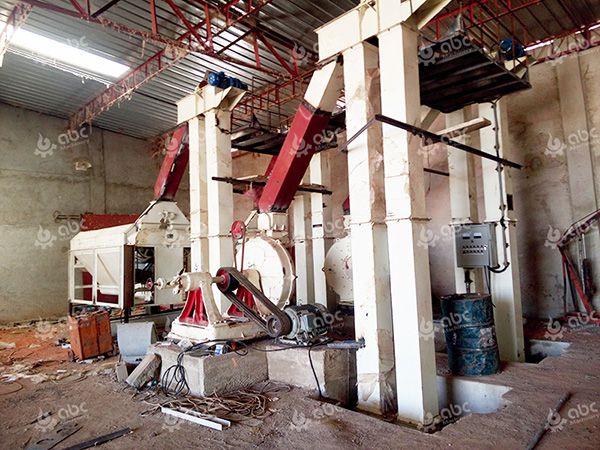
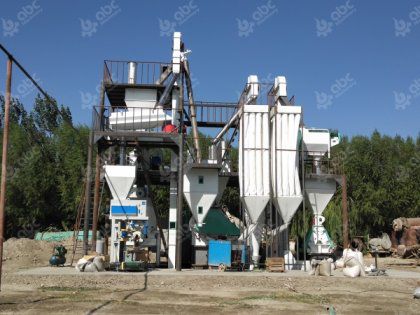
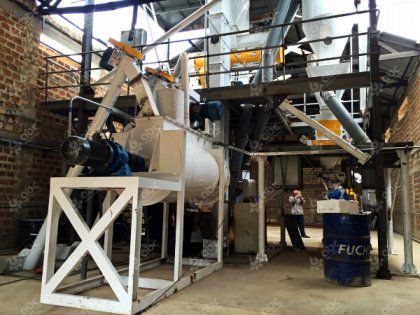
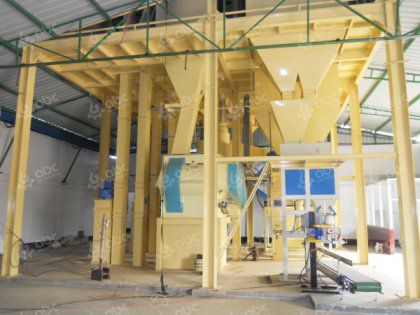
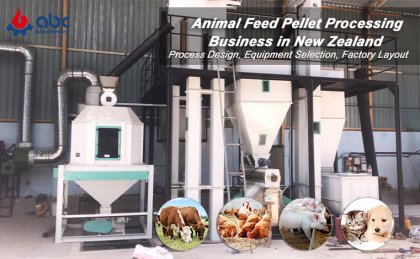
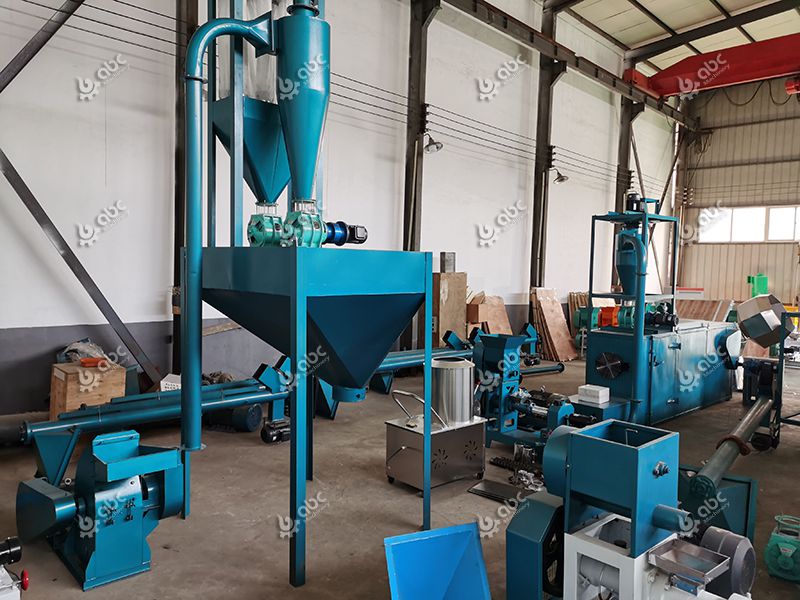
Method 3: Industrial-Grade Pellet Fodder Production Line (For Farms/Commercial Producers ≥500 Chickens)
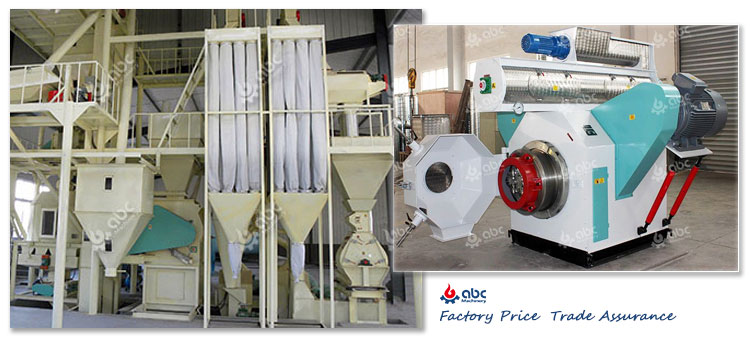
3-5 TPH Farm-Grade Chicken Feed Pellet Production Line
-
Core equipment setup: Invest in a complete line including: ① Hammer mill (for fine grinding of grains/meal), ② Mixer (for uniform blending of dry ingredients + liquids like oil/vitamins), ③ Conditioner (steams the mixture to 80-90℃ to improve pellet binding and nutrient absorption), ④ Ring die pellet mill (high-capacity pelleting, 1-5 tons/hour), ⑤ Cooler (cools pellets to ambient temperature), ⑥ Screener (removes fines for uniform product), and ⑦ Packaging machine (bags pellets for storage/distribution).
-
Optimize the production process: Use computerized formula management to adjust nutrition for different chicken types (layers, broilers, chicks). Automate ingredient weighing and mixing to ensure precision—this reduces waste and maintains consistent quality.
-
Quality control: Test raw materials for moisture (10-12% ideal) and nutrient content; monitor pellet hardness (should not crumble easily) and particle size. Store finished pellets in bulk silos or sealed bags in a climate-controlled warehouse.
-
Scale efficiently: Industrial lines let you source ingredients in bulk (reducing per-kilogram costs) and produce large batches—ideal for selling to other farmers or feeding thousands of chickens.
Business tip: Prioritize energy-efficient equipment and factory-direct suppliers to lower upfront costs. Many manufacturers offer customized lines based on your output needs (e.g., 1 ton/hour vs. 5 tons/hour).
Creating homemade chicken feed involves flexible techniques—from simple mixed rations to compact pellets—adaptable to your time, budget, and flock size.
Elevating Feed Quality: Tips to Boost Nutrition & Palatability
High-quality feed directly translates to healthier chickens, better egg production, and faster growth. Beyond basic ratios, these strategies refine your feed’s effectiveness.
1. Optimize Nutrient Absorption
-
Add natural supplements: Probiotics improve gut health, enzyme preparations break down complex nutrients, and herbal additives (garlic, oregano) boost immunity.
-
Test ingredients: Work with a nutritionist to analyze local crops for deficiencies (e.g., low protein in certain grains) and adjust ratios accordingly.
2. Refine Production & Storage
-
Control grind size: Grains should be 1–3mm (finer for chicks, coarser for adults) to balance digestion and pellet stability.
-
Adjust pellet machine settings: Increase pressure for harder pellets (reduces waste) and maintain temperatures of 80–90°C to enhance starch gelatinization.
-
Store smart: Use airtight, moisture-proof containers and consume pellets within 6–8 weeks to preserve vitamins.
Troubleshooting Common Homemade Feed Issues
Even experienced makers face challenges—here’s how to resolve them:
-
Mold growth: Reduce moisture in the mixture, add diatomaceous earth (a natural preservative), or store feed in a cooler location.
-
Poor palatability: Mix in small amounts of molasses or fresh greens to entice picky eaters.
-
Nutrient deficiencies: Watch for signs like thin eggshells (low calcium) or slow growth (low protein) and adjust ingredient ratios.
Explore our curated guides to take your homemade feed or set up a chicken feed production plant to the next level, and stay tuned for more expert content on poultry care, nutrition, and farming best practices. Your chickens deserve the best—start crafting feed that meets their needs today! Please feel free to conatct us!
 Feed Processing Technology